“The Cure” is a set of ground and space Special Task Force (STF) missions requiring a team of five players.
For ground, each member of the team should have the following:
- 1 [Tribble of Borg]
- 1 [Frequency Remodulator] or [Fractal Remodulator]
- 30+ [Large Hypo]s
- 20+ [Minor Regenerator]s [Elite only]
- 20+ [Major Regenerator]s [Elite only]
- 5+ [Critical Regenerator]s [Elite only]
- [Optional] 30+ [Large Shield Charge]s
- [Optional] 30+ [Large Power Cell]s
Walkthrough[ | ]
Toward the second gate[ | ]
Finding a cure
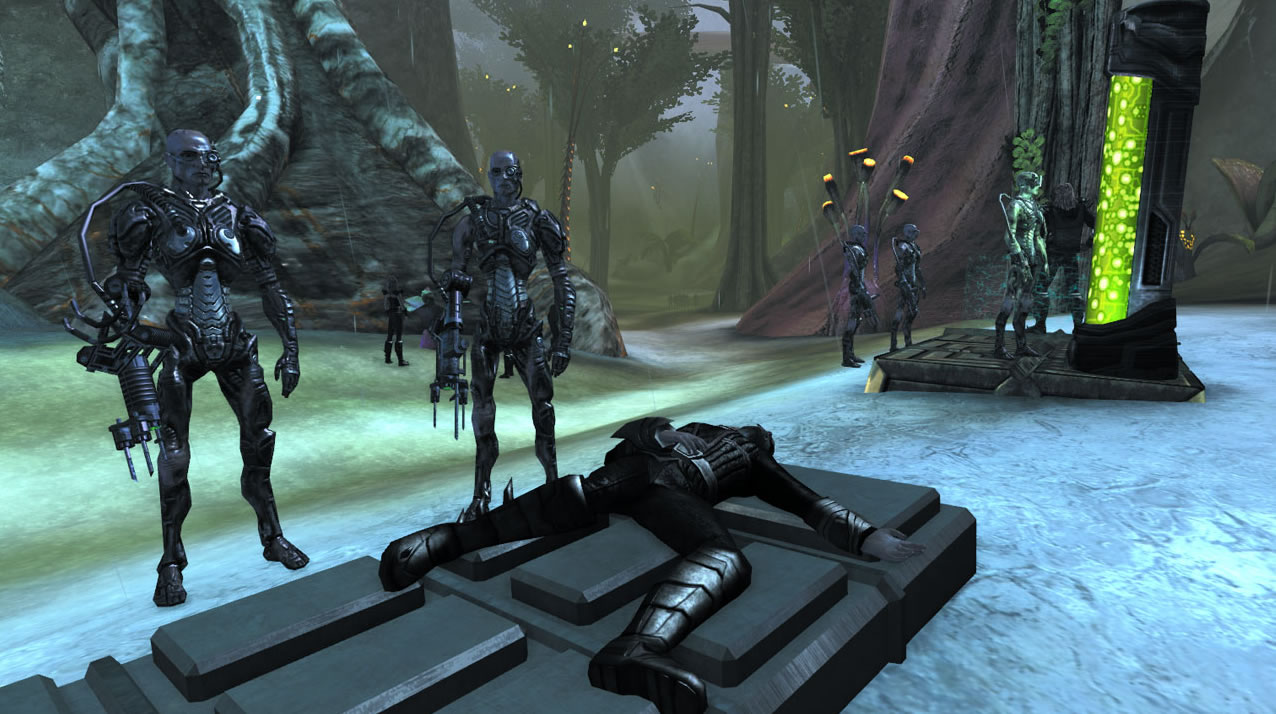
The first gate demonstrates the basic principle of activating the transformers in sequence to deactivate the gate. The first prisoner and first sample are not far beyond.
Further on is the first turret. Approaching the turret will activate the timer for the optional objective. This is an opportunity to practice destroying turrets found later in the level.
The second prisoner is before the second gate area.
Toward the third gate[ | ]
The third prisoner and second sample is right after the second gate. The last prisoner and the third sample is just before the path bends back east.
The last sample is right before the third gate area on the right. It is somewhat tricky to spot because the darker color of the ground camouflages the slab and corpse.
Destroying the shield generator[ | ]
After the third gate is the final turret. Destroying this turret within fifteen minutes of approaching the first turret completes the optional objective.
The path to the south leads to Armek of Borg, the boss; that path is blocked by a shield. Instead, head north and destroy the shield generator. Once the generator is down, head back south to Armek.
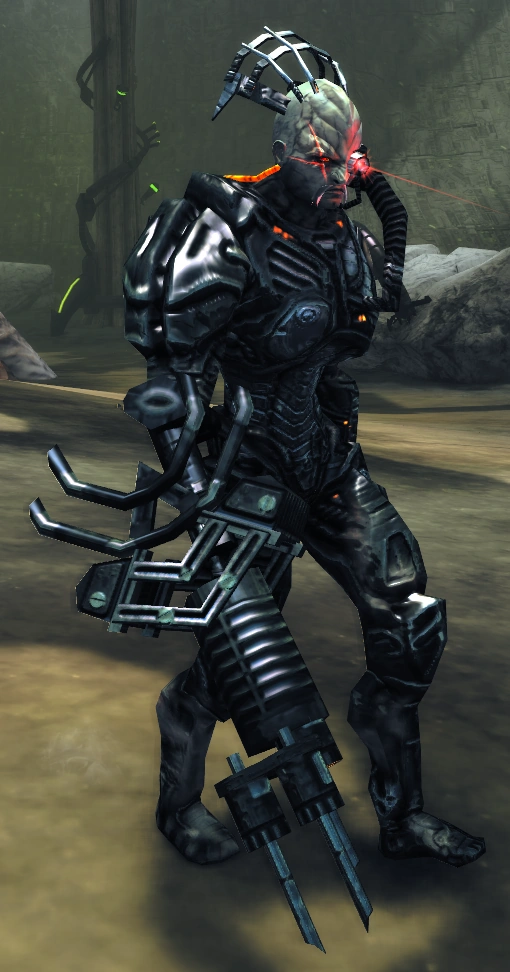
Armek[ | ]
Approaching Armek will cause a rectangular area, centered on him, to be enclosed by an impassable force field. Respawning will place players outside of the arena while the boss fight is active. If all players are killed, Armek will return to his starting position and the force field will drop, allowing the team to try again.
Armek's ranged attack has a "chain lightning" affect like the Synchronic Proton Distortion Prototype Assault Rifle, making it difficult for teams to stay together and revive one another. It can also hit targets outside of the force field. The attack can also chain through turrets, support drones, and summoned NPCs making their use risky.
The ranged attack has a range of 30 m, and is outranged by Sniper Rifles.
Armek may assimilate players.
Stage 1[ | ]
The first stage opens by Armek calling down orbital strikes around the arena. He will move around the arena to engage. Once sufficiently injured, Armek will move back to his starting position to begin the second stage.
Stage 2[ | ]
The second stage opens with more orbital strikes. Armek will not move during this stage, but will surround himself with an incontiguous cover shield wall. Once injured enough, stage three will begin.
Stage 3[ | ]
The third stage is the same as the second stage, except Armek will lay Force Field Domes around the arena to hamper movement.
Strategies[ | ]
Close combat[ | ]
Engage Armek at close range. One team member should be close enough to induce Armek to use his melee attack rather than his ranged attack. Other team members should be close enough to assume that role at any time. This also allows players to be close enough to revive each other quickly, and use a wide range of weapons loadouts.
Snipers and distractions[ | ]
The team splits into two groups: two remain on the outside of the arena with the remainder entering the arena. Both groups must move to opposite sides of the arena.
The outside group is tasked with keeping Armek's attention; the outside group may respawn at will. The inside group must only attack when Armek's attention is on the outside group, Using sniper rifles allows the inside group to keep their distance, making it easier for the outside group to maintain contact with Armek. The inside group may need to withdraw away from Armek to give the outside group time to re-establish contact.
Once the second stage is reached, there is a spot in the south-west corner that may be used to shoot Armek with a sniper rifle that Armek cannot hit directly. However, this spot is still vulnerable to "chain lighting".
Defense turrets[ | ]
Stage 1[ | ]
Defeating all defense turrets work the same way. A turret will erect a force field around itself that blocks pathing but not weapons fire, and begin shooting when approached. Damage the turret to move to the second stage.
Stage 2[ | ]
Heavily damaging it will cause it to stop shooting, begin regenerating health, and drop the force field dome. cover shields and fabricated turrets will spawn around the perimeter.
A player must move to the defense turret, passing between gaps in the shields, and interact with the turret to lay a charge. Laying a charge takes time. Two players may lay charges simultaneously. A charge must be successfully set before the turret regenerates completely, or else the encounter will return to stage 1. For this reason, team members must continue to damage the turret to slow its regeneration.
If a player interacting with the defense turret is interrupted while laying a charge (for example, by taking damage), the process of laying the charge will have to be restarted. Team members should keep the attention of the fabricated turrets off charge-layers to prevent this.
A charge set before the turret regenerates will destroy the defense turret and remove the cover shields. The fabricated turrets must be destroyed separately.
Gates[ | ]
The strategy for dealing with the second and third gates are the nearly the same. The only difference is that the second gate has a drone patrol that should be destroyed before activating the first transformer.
To deactivate the gate, the four transformers must be activated in sequence, starting with the one furthest from the gate. Activating the first and second transformers will activate a defense turret each. Once the first transformer is activated, there is a limited time to activate the remainder and bring down the gate. If the timer expires before this is done, the process will have to be started again. A failed attempt will respawn the defense turrets.
Worker Drones will beam in to deactivate the transformers. It takes time for deactivate transformers. If the first transformer is deactivated, the entire process will have to be restarted. The team should be prepared to move around and kill the drones. Chroniton Mine Barriers and Transphasic Bombs work well here.
A quick way to tell if the gate has been deactivated is if the energy beams connecting the transformers disappear and the defense turrets do not respawn. If they respawn, the attempt has failed.
Difficulty[ | ]
NPCs are level 45 on "normal", and level 53 on "elite".
Versions[ | ]
The mission was shortened for Season 5. The number of gates was reduced from 4 to 3 (with the mission starting at the 2nd gate), and the number of prisoners and samples needing to be rescued and collected was reduced.