The following article or section describes content unavailable to XBOX One and PlayStation 4 players. |
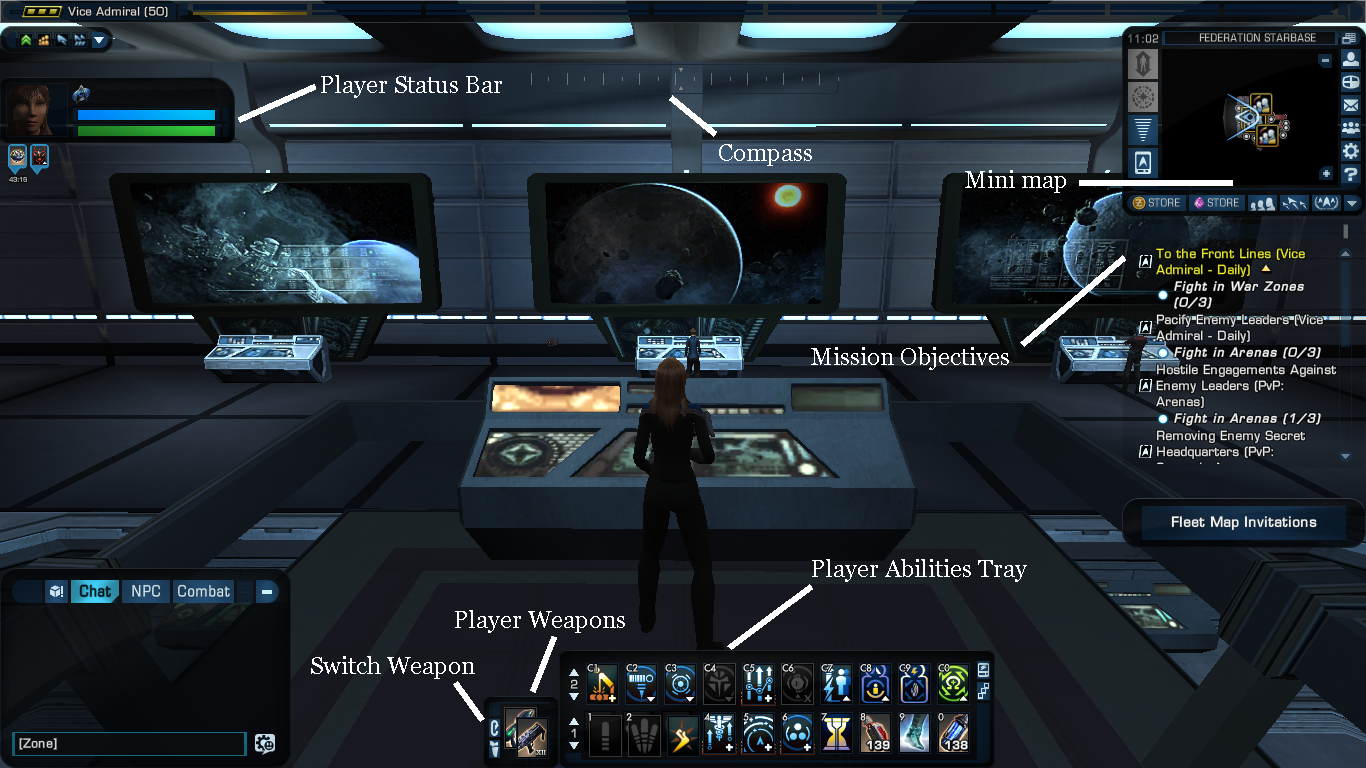
The user interface during ground combat
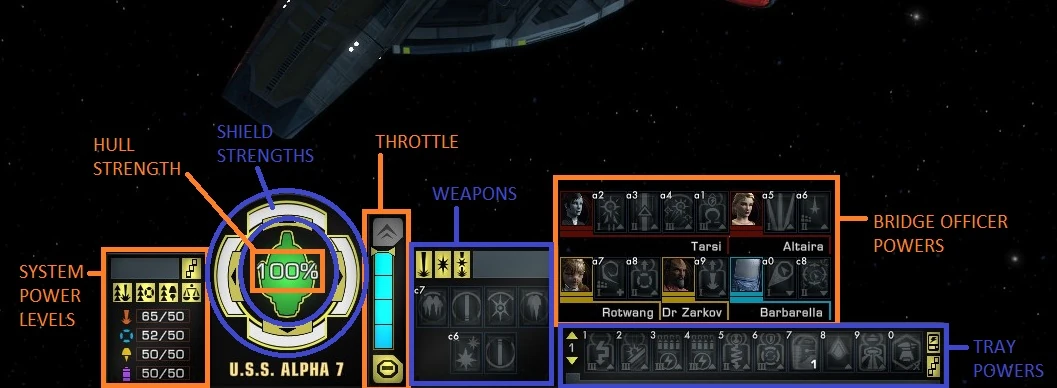
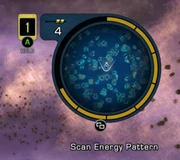
The user interface in sector space
The user interface (often simply referred to as UI) is the method by which information is presented to the player and the player interacts with the game itself. The design of the UI is now loosely based on the LCARS computer interface seen in the Star Trek shows and originally created by Mike Okuda. Although the general layout remains identical, each faction has its own design with a set of different color schemes available for all players.
Controls[ | ]
- See also: Key binds, Guide: Keybinds, Joystick control setup
This is a very basic guide to the initial controls of the game, both in flight and ground modes, and also a couple of "tricks" to help you along the way.
Please Note The following key mappings are true for the Windows English keyboard layout. Other OSes or language layouts may vary.
The game has two basic playing modes:
- Ground
- See also: Ground combat
This is where your character is in person on the screen either in friendly territory such as a starbase or in enemy territory such as a ship or planet.
| Key | Action |
|---|---|
| W | Run Forward |
| Shift + W | Sprint Forward |
| S | Run Backward |
| A | Turn Left |
| D | Turn Right |
| Q | Strafe Left |
| E | Strafe Right |
| R | Toggle Auto Move Forward |
| F | Interact with an object near to you, such as a person, crate or turbolift |
- Space
- See also: Space combat
This is where you are guiding your ship through either open space or within a star system
| Key | Action |
|---|---|
| Q | Decrease flight speed |
| E | Increase flight speed |
| R | Toggle full speed |
| Shift+ R | Toggle Full Impulse (Star System) or Quantum Slipstream (Sector Space after lvl. 50) |
| A | Bank Left |
| D | Bank Right |
| W | Nose down |
| S | Nose Up |
| F | Interact with an object near to you, such as an anomaly, or accept a prompt |
Player abilities[ | ]
- See also: Player abilities
On the screen in either mode are controls for actions that your character can perform. In ground mode you will be shown your weapon's main action (normal "fire") and other possible actions such as "Exploit attacks". These each have a number to the top left of their control, and can be activated by pressing the corresponding key on your keyboard (1 through 0)
You can have up to four rows of controls on screen at any one time in both ground and space modes, to set these click the icon to the top right of the control module that looks like three stacked playing cards. This brings up a control that allows you to select between one and four rows of controls.
On the left hand end of these rows is a number between 1 and 10 with up and down arrows. These allow you to set up your own configurations and scroll between available controls.
- What do A, C and Sh mean?
These are the methods of using that control on the keyboard
A = ALT, C = CTRL, Sh = Shift.
Bridge Officer abilities[ | ]
- See also: Bridge Officer abilities
Each Bridge officer has training in different capabilities allowing them to vastly change the basic setup of your ship, be it by adding extra power to your next phaser shot or healing your shields mid-combat.
The initial play setup gives you a row of icons below your main ability section, showing the face and abilities of each of your bridge officers. When you start the game each officer will only have one ability, but as you progress through the game the number and class of abilities increase (you can also train your officers either through your own abilities, additional bridge officers or at certain starbases).
These action icons will generally have "A" and a number in their action boxes. To control with the keyboard hold the ALT key and press the appropriate number.
Remember, when purchasing a new ship, set the bridge officers! Also you might try to remember to keep them as trained and as promoted as possible to increase their additional abilities.
Moving Controls[ | ]
The game has a funny habit of moving your controls around, especially when you gain new abilities, even as far as new weapons!
To stop your firing actions, heals, buffs and debuffs being all over the place you can move the controls around as you wish them to be. Just do this when not in a combat area to avoid some blushes and much muttering of "Where did my phasers go!?"
To move a control, drag it with the right mouse button from where it currently resides to your required location. This can be within or across action bar rows (see above). After you have your actions set up the way you want them, you can click a checkbox that locks your action bars to prevent your abilities from being moved around or from accidental removal altogether.
Advanced control setup[ | ]
All of the key mappings and controls can be adjusted and moved around the screen using the controls in the option menu. To manually adjust the placement of monitor panels and controls, click the game options icon to the right of the minimap and select the top HUD option, then drag the corresponding green boxes to your convenience.
Luckily, they also have a reset function!
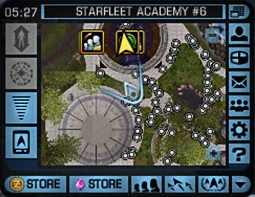
Minimap[ | ]
The Minimap on PC

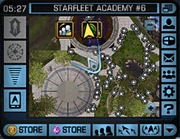
The Minimap on Consoles
The Minimap provides a top-down view of the players immediate environment, showing the location of team members, enemies, and the players direction and camera angle.
The player's bridge officers and constructions such as turrets show as green circles. Other friendly or neutral NPCs are shown as white dots, hostile NPCs as red dots. Objectives are highlighted as large white or yellow tinted areas with a dashed circle around them.
Pressing M gives access to area and galaxy maps, as well as the systems list.
PC[ | ]
A variety of buttons and displays surround the map on all sides. Starting on the top left corner and going clockwise they are
- clock - dislaying the time of your set time zone
- current location - the name of your current map and its instance number (click to switch instances)
- Display Big Map
- Character Status
- Inventory
- Access In-Game Mail
- Social - displays friends list, blocked users etc.
- Game Menu - access game option, change character, log out etc.
- Help and Support
- More (dropdown menu with additional selections)
- Dilithium Exchange (trading refined dilithium for Zen and vice versa)
- View R&D Progress
- PvP Task Force Operations
- Visit Starship Bridge
- Visit Shuttle Bridge
- Bulletins
- Notification Settings
- Music Player
- Game Credits
- Your Fleet
- PvE Task Force Operations
- Duty Officers
- Visit the Dilithium Store
- Visit the Zen Store
- Hail Starfleet/KDF
- Scan Area - scan the area to be pointed to the closest areas of interest (e.g., mission objectives or anomalies)
- Transwarp
- Abort Mission / Beam To Ship / Depart System (depending on where you are).
- + Zoom In
- - Zoom Out
[ | ]
The Game Menu can be accessed by clicking the icon that resembles a cog, next to the mini-map. From here you can access several in-game options on the left. On the right major events and sales are highlighted under the header "Around the Galaxy".
- Rearrange HUD
- This option allows you to rearrange various parts of the Heads-Up Display (HUD), such as the Inventory window, Chat window, XP bar, mini-map, and missions list.
- Options
- This gives you the ability to change in-game settings and options.
- Basic: This tab shows options to change various basic settings, such as camera X/Y inversion, non-instant tooltip delay, and interface scaling.
- Audio: This tab shows options to change various audio settings, such as volume, output device, and media player.
- Video: This tab shows options to change various video settings, such as display mode, antialiasing, lighting quality, refresh rate, and texture quality.
- Control: This tab shows options to change various control settings, such as camera follow type, maximum targeting distance, and auto attack settings.
- Key Binds: This tab shows the default game key bindings and allows you to change them and add your own.
- HUD: This tab shows various HUD options, such as reticle appearance, how names are shown for players and NPCs, and damage floater settings.
- Chat Settings
- This shows various settings for the in-game chat. You can also access this by right-clicking the empty space beside a Chat window tab.
- Tabs: Here you can change settings for the various tabs used in the Chat window, as well as create custom tabs for separating chat content into groups.
- Channels: This allows you to join or create custom channels for chat.
- Options: This shows various settings for chat such as font size, opacity, fade-out delay, and profanity filtering.
- Change Character
- This takes you to the character selection screen, logging out your current charcter.
- Log Out
- This logs out your character after confirming it with you first. Afterward you are brought to the login screen.
- Exit
- This quits the game entirely after confirming it with you first.